Uploading Your First Script To The SDN
Prerequisites
Many tools can be used to push and pull to the SDN, however, in this guide, we will use IntelliJ's built-in git tools. You can install Intellij from here:
Requesting a git repository
-
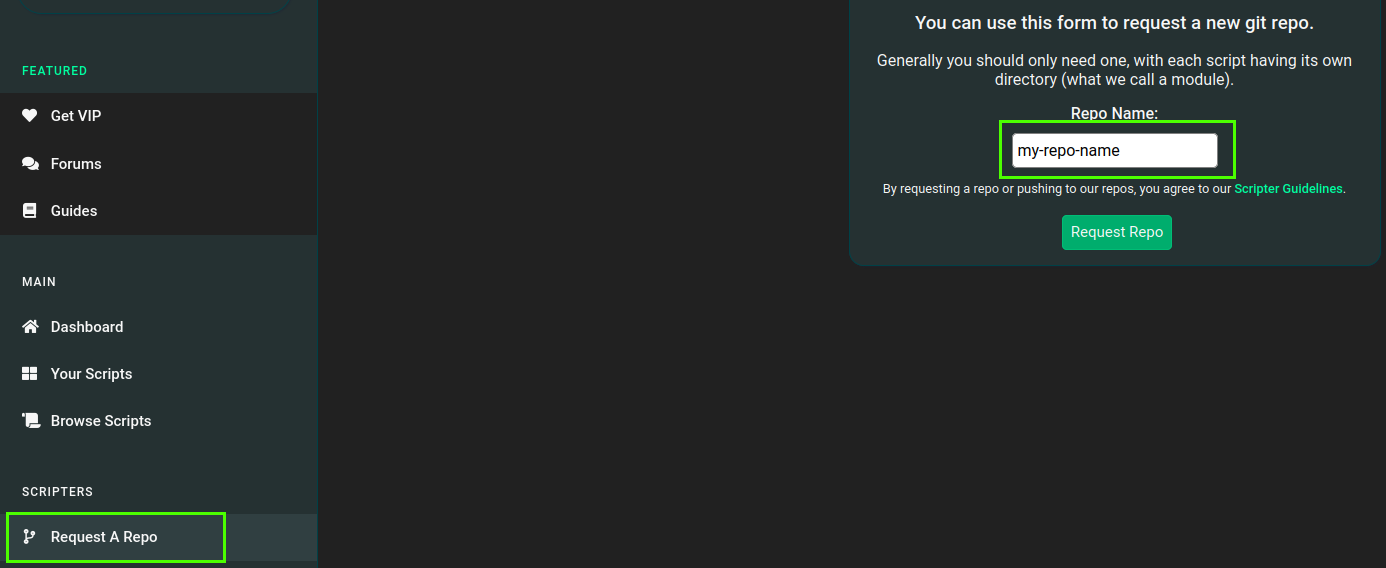
Head over to the SDN, click Request a Repo, and type a repo name this can be anything but using your forum name would be just fine. Once you're happy with the name you've chosen click Request Repo.
-
After submitting your request, you'll need to wait for a DreamBot Developer to accept your request, you'll know once your request has been accepted because your requests tab will show the following:

You now have a repository you can push and pull scripts to the DreamBot's SDN. Keep this page open because you'll need this for the next step.
Danger
NEVER share your repo's password with anyone, they will have full access of your source code.
Connecting IntelliJ IDEA to your newly created repository
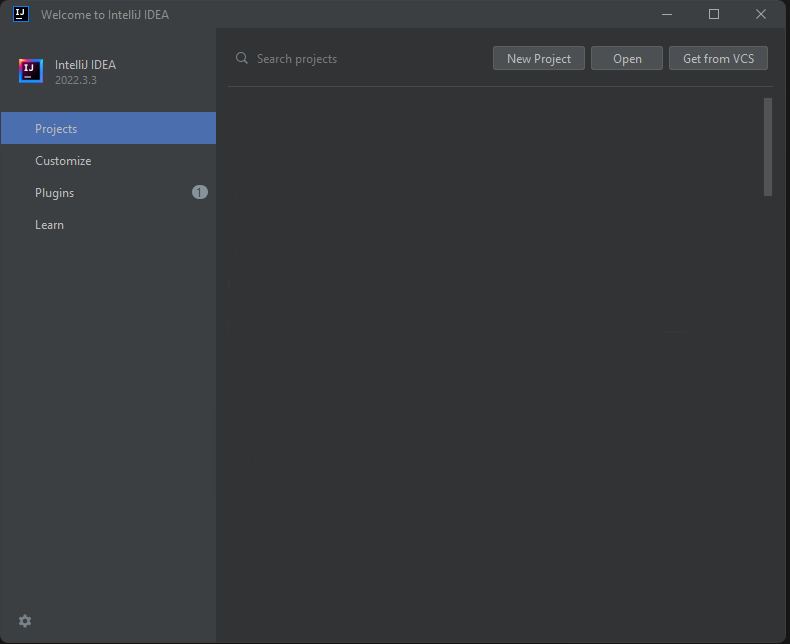
Open IntelliJ IDEA and you will be met with the following screen:
Connecting to your repository
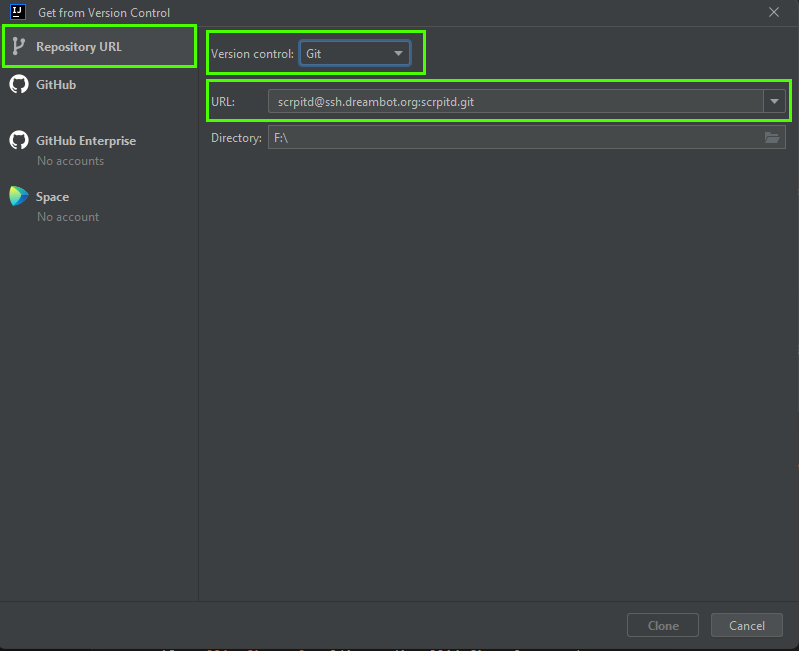
- Click Get from VCS a new window will appear.
-
In the new window ensure that the repository URL is selected, Version control is set to git and the URL contains your Git URL which is found in your Requests. set the directory to an empty folder anywhere on your PC.
-
Click Clone a small window will appear titled SSH Confirmation click Yes, after this another window will appear titled SSH Password Login here you will have to enter the password you find under your Git URL on your Requests page.
Uploading your script to DreamBot's SDN
Copying your source files to cloned repo directory
Now you have connected to your repo and you want to upload your first script. Make sure that your script is working as intended on the DreamBot client before proceeding
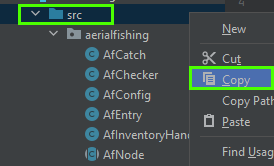
- Open your IDE where your script is located. find the src -> Right Click -> Copy.
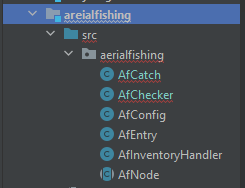
- Navigate to your repo directory inside that directory make a folder with the same name as your script name so for example I would use areialfishing, Your folder hierarchy should look similar to this:
- MyScripts (cloned repo root)
   - areialfishing (Module Name)
     - src (What you copied from your IDE)
       - areialfishing
          - AfCatch.java
          - AfChecker.java
          - AfConfig.java
          - AfEntry.java
          - AfInventoryHandler.java
          - AfNode.java
Committing your script to DreamBot's SDN
-
Open IntelliJ IDEA again and you will see the newly added files in your project explorer to on the left:
Info
You will see errors but this is okay and is normal.
-
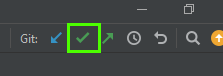
Now you're ready to make your first commit & push, on the top right of IntelliJ you will see some icons after Git click the Green Tick this will open a panel on the right.
-
At the top of the panel, it will indicate what files will be changed/uploaded double check to make sure everything is there, Once you're ready click Commit & Push
You've now uploaded your script to DreamBot's SDN!