Publishing Scripts on the SDN
In this guide you will learn how to get started in using the SDN to release and maintain your scripts.
Set Up a Repository
To begin publishing your scripts on the SDN, you will need a repository that will be used to hold the source code of your scripts and to build the script from. This section shows you can obtain one and how you can connect your IDE to it.
Warning
If your DreamBot account is recently created, you may not be eligible to request a repository just yet. In such case, please try again later.
Request a Repository
Head over to the Request New Repo page and click the Request Repo button to have one to be created for you. Your git repository will remain pending creation until the SDN Manager reviews and handles your request. You can view the status of the request on the Requests page.
Once the request is approved you will find your git repository credentials in the request comments. Keep the requests page open as you will need the repository credentials in the next steps.
Danger
Never, under any circumstances, share your repository password. Anyone with your password will have full access to your repository, including your scripts’ source code, and can push changes on your behalf, making you responsible for the changes. The DreamBot staff will never ask for your repository password.

Connect Your IDE to the Repository
Next, you will need to set up your your IDE to be able to move files between the repository and your computer. Your DreamBot repository is referred to as the remote repository whereas the local project on your computer is the local repository.
If you already have a local repository containing your script's source code, follow the steps in Add a Remote to add your DreamBot repository as a git remote in your local repository. Otherwise, follow the steps in Clone the Repository to start fresh by cloning the remote repository into a new project.
- From the IDE's toolbar, select VCS > Create Git Repository....
-
You will be prompted to choose the directory to create the repository in. Select the root directory of your project which contains your module directories. For example,
~\Projects\my-scripts\.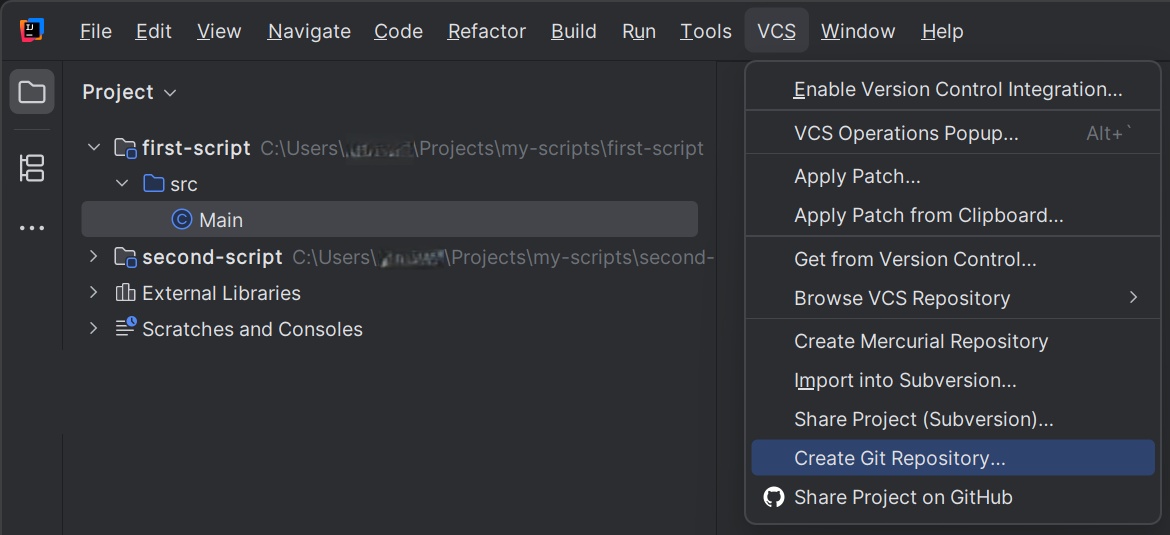
-
The Git repository has now been created. Next, select Git > Manage Remotes... from the IDE's toolbar.
-
In the window that pops up, click the + symbol to add a new remote.
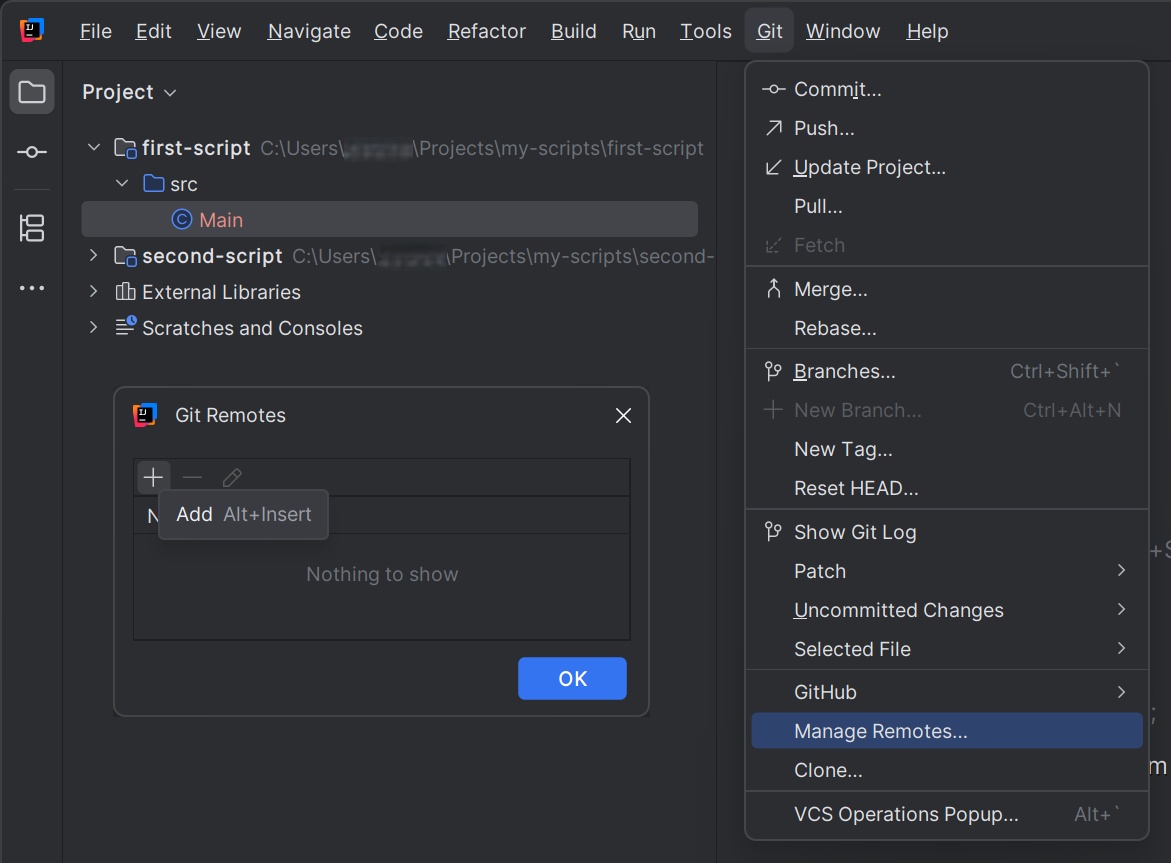
-
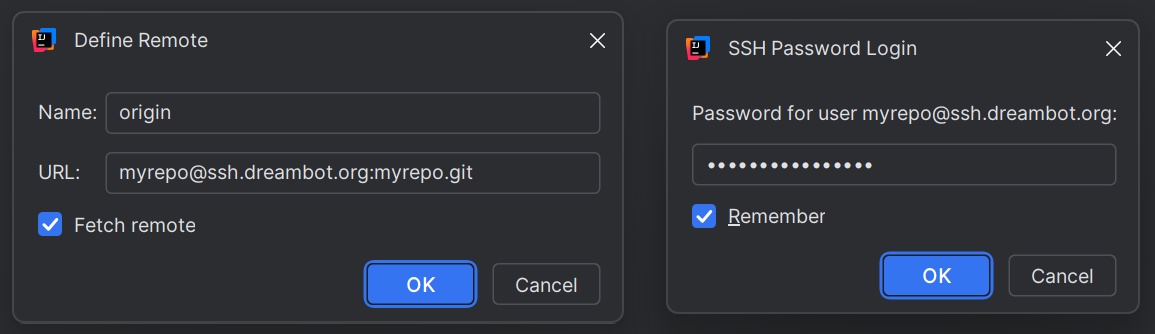
Set
originas the remote name and paste in your repository URL. - Check the Fetch remote box and press Ok.
-
You will be prompted for the repository password. Paste in your repository password and optionally choose to have the IDE remember it for future use.
-
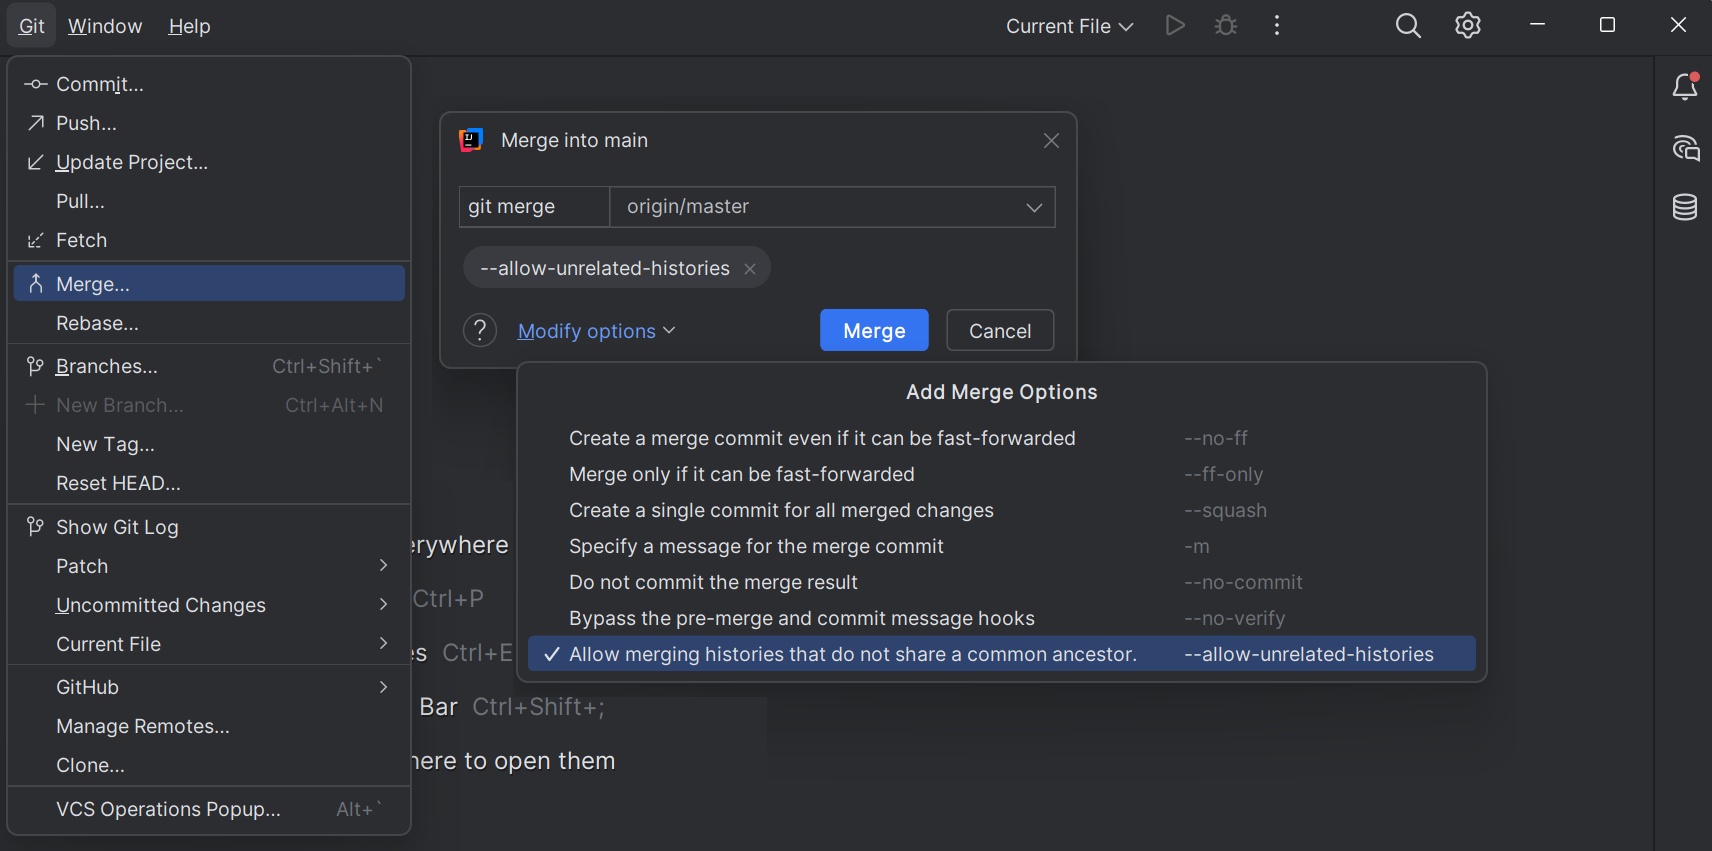
After the remote has been added, select Git > Merge... from the IDE's toolbar.
- Enter
origin/masteras the branch to git merge from. - From the Modify options select the Allow merging histories that do not share a common ancestor.
-
Finally, click Merge. Should any merge conflicts arise, resolve them.
Open up IntelliJ IDEA and you will be met with the welcome screen:
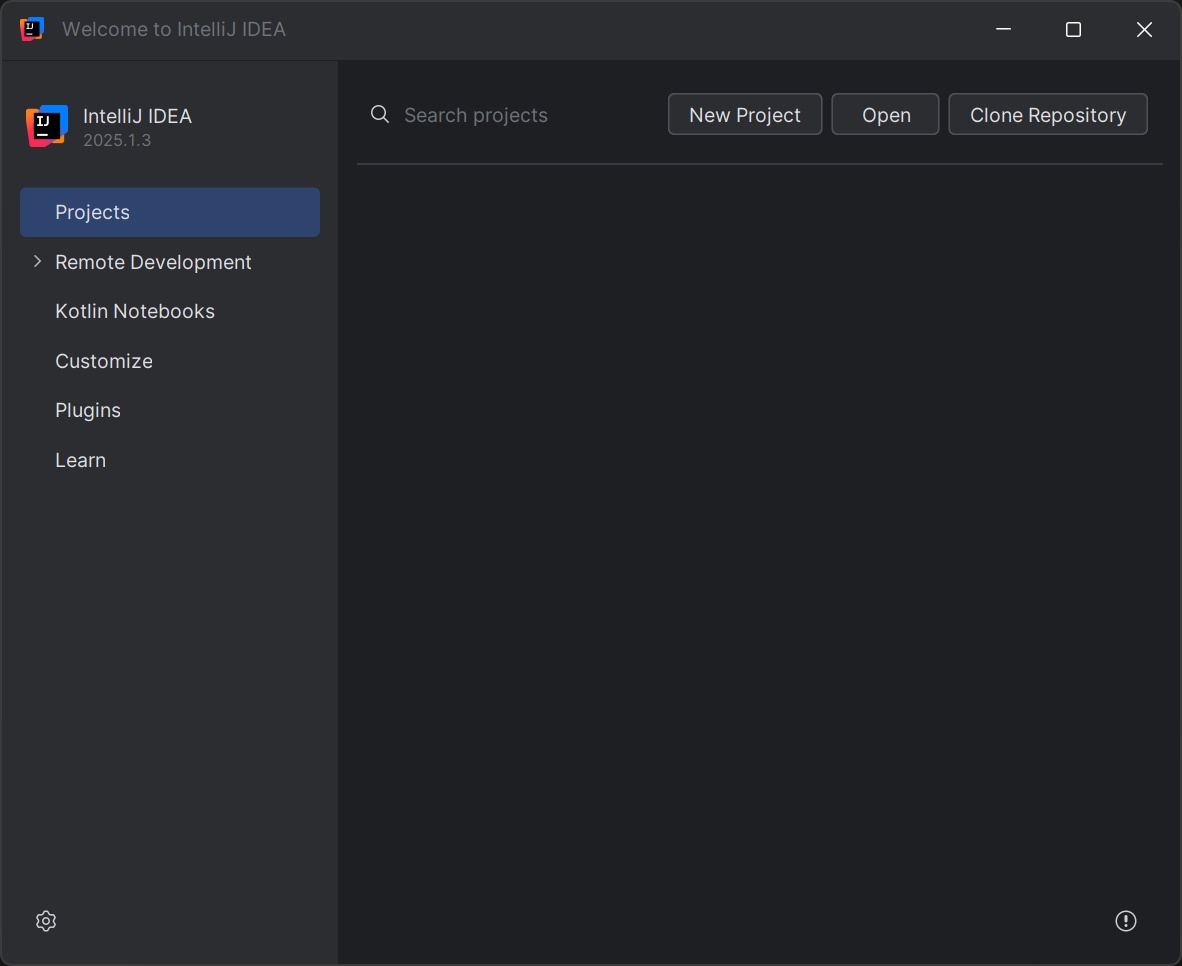
- Click on Clone Repository and a new window opens.
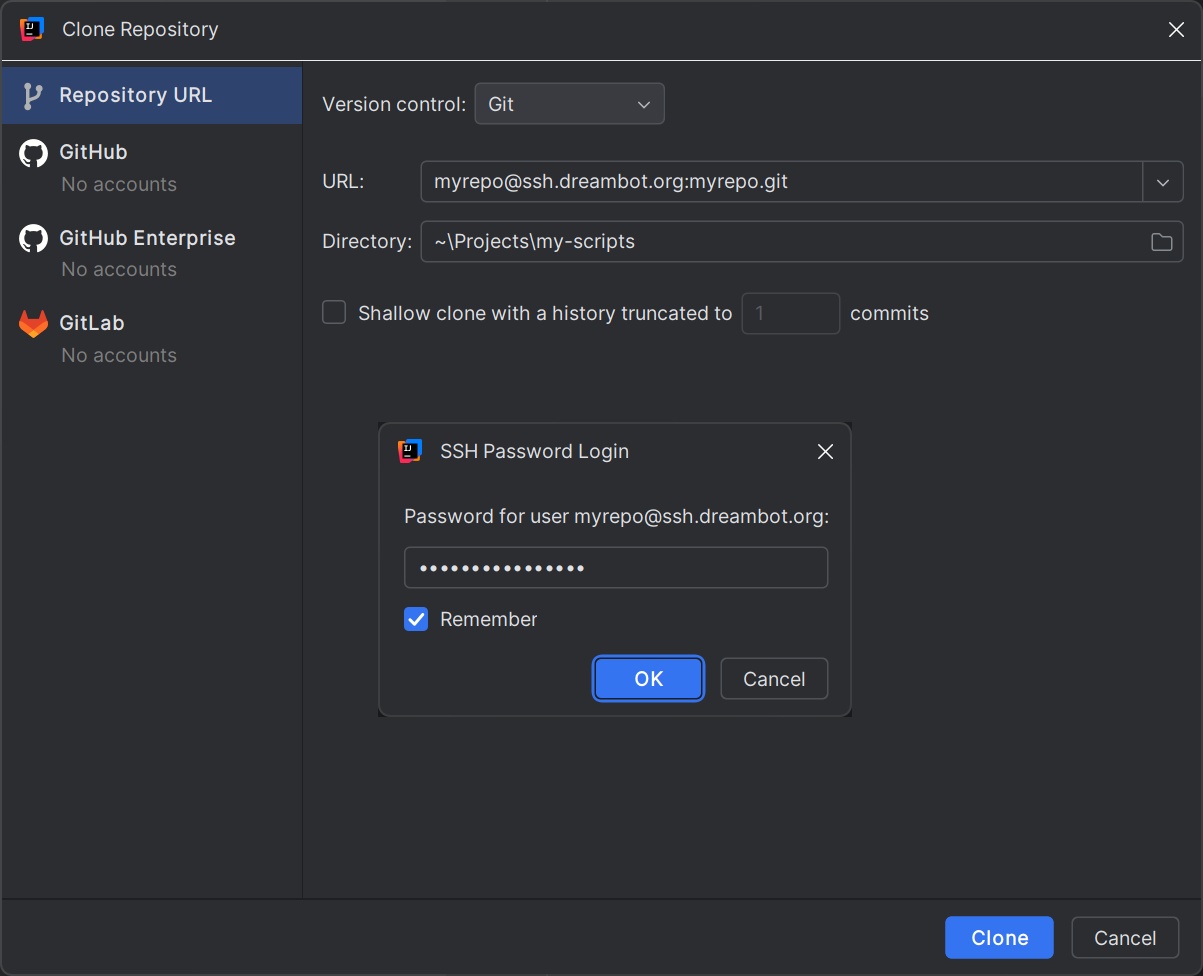
- In the Clone Repository window, select Repository URL from the left.
- Ensure Version control is set to Git.
- Paste your repository URL in the URL field.
- Choose an empty directory on your computer in which the repository is cloned into.
- Press Clone to start cloning the repository.
- You will be prompted for the repository password. Paste in your repository password and optionally choose to have the IDE remember it for future use.
- Finally, press Ok.
The IDE now creates and opens a new project for you with the contents of your remote repository.
Your local repository is now linked to the remote repository and therefore you now have the ability to push changes to your DreamBot repository.
Push a Script to the Repository
After the project in your IDE is connected to the repository, you can start moving files between your local repository and the remote repository. Uploading files from your computer to the remote repository is referred to as pushing to the repository. To push your local files you will need to:
-
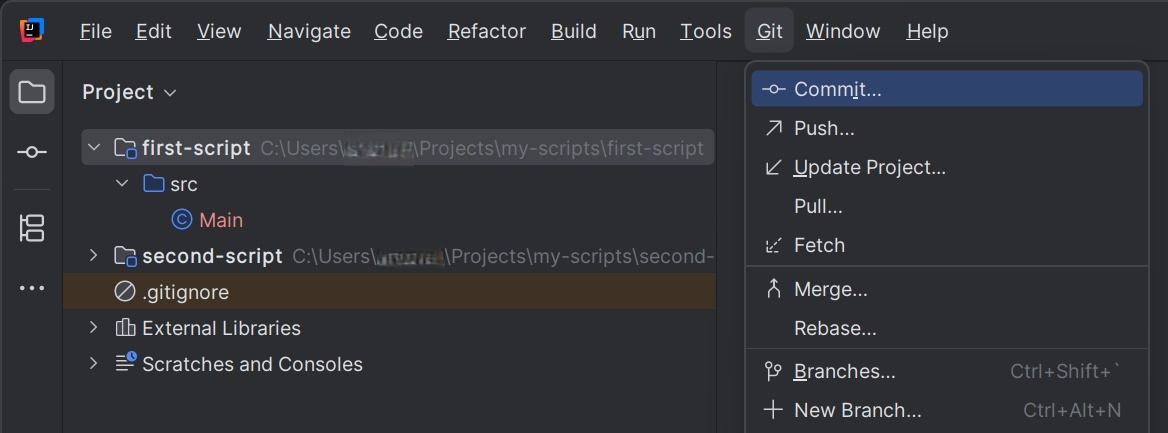
From the IDE's toolbar, select Git > Commit... to open the Commit tool.
-
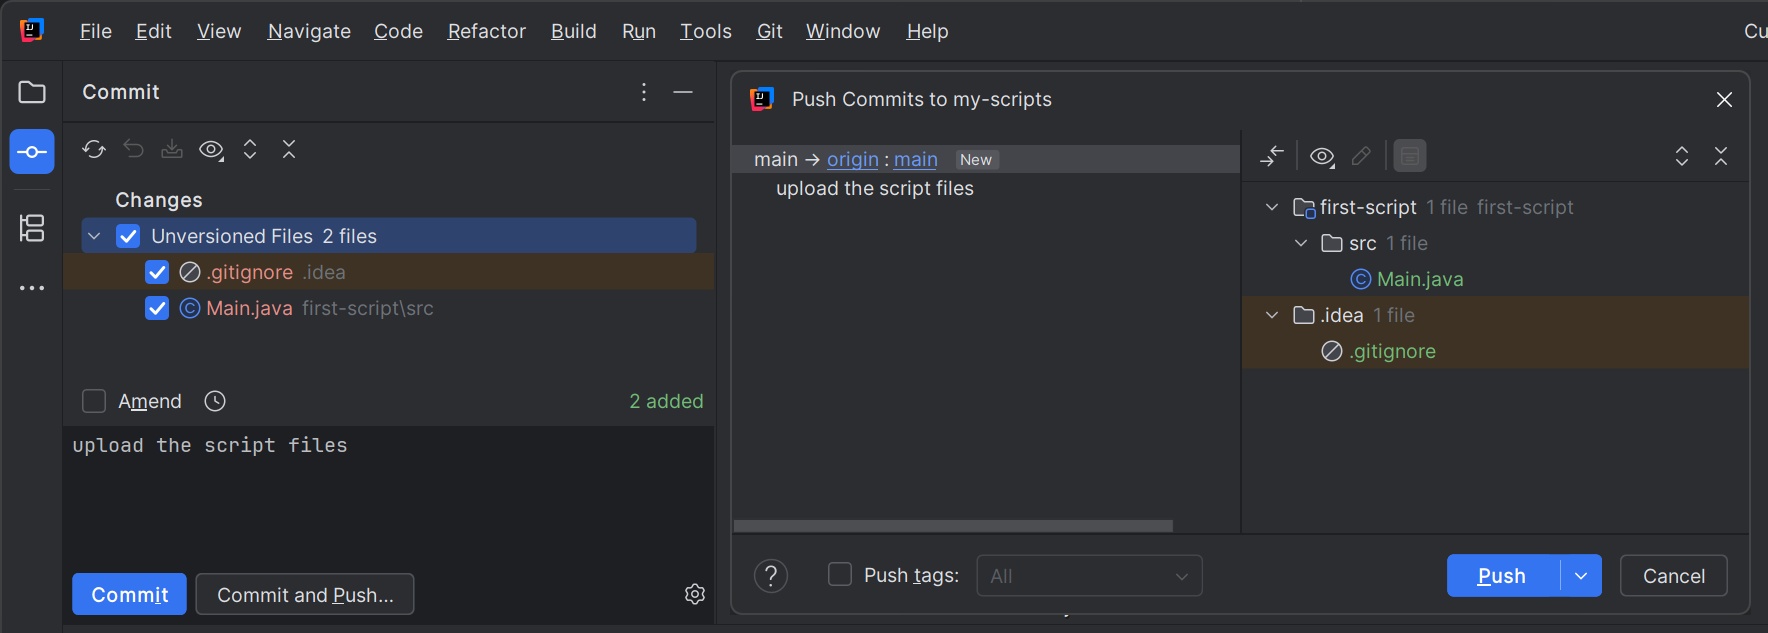
The Changes panel lists all the files that have been changed in your local repository but are not yet committed to be uploaded to the remote repository. Check the boxes next to all your project's files.
- Write a Commit Message that describes the change, such as
upload the script files. - Click on Commit and Push... to create a commit of the changes and to open the Push Commits window right after.
-
In the Push Commits window you can view the commits you are about to push to the remote repository. Finally, click on Push to send the script files to the remote repository.
Now that you've uploaded your script to your DreamBot repository, you may proceed to releasing the script.
Release a Script
When your script is ready to be released and you have pushed it to your repository, releasing it is the next step.
Requirements for SDN Scripts
Releasing a script on the SDN has some requirements and limitations you should be aware of before submitting the script. Scripts will be rejected if they fail to conform to them.
Scripter Guidelines
All SDN scripts must adhere to the Official DreamBot Scripter Guidelines.
Java Version
SDN scripts are compiled using Java 11. This means any API added to Java in later versions is not available and can't therefore be used in SDN scripts.
Tip
In IntelliJ IDEA you can specify Java 11 as the project's Language Level in the project settings. By limiting the language level the IDE will warn you whenever you try to use API that's unavailable.
External Libraries
The client is bundled up with certain useful libraries you can use. Any library that is not in the client can't be used. Even if the library is open source, you are not allowed to include the source code of an external library as part of your script's source code.
The libraries you can use in SDN scripts include but are not limited to:
Script Files
The SDN compiler will only include Java source (.java) files in the build process. This rules out at least the following:
- SDN scripts can't be written in Kotlin.
- Resources can't be included in the script itself. Any resources, such as images or configuration files must be loaded
from the internet at runtime or be parsed from a
Stringvariable within the script.
File Structure
Your project's files must be structured in a certain way. At the root of the repository directory should be your module
directories, one for each script. Inside each module there must be a src directory at the root, which contains the
source code for that script.
repository/
├─ woodcutting/
│  └─ src/
│     └─ ...
└─ fishing/
   └─ src/
      └─ ...
Important
If you have several scripts that share a common code base, you may be required to use a single module for the scripts instead. Read more about this in the Using a Single Module for Your SDN Scripts tutorial.
repository/
└─ all/
   └─ src/
      ├─ woodcutting/
      │  └─ ...
      ├─ fishing/
      │  └─ ...
      └─ common/
         └─ ...
If your script meets the requirements, it may be eligible to be released on DreamBot.
Fill the New Script Form
If you think your scripts is eligible to be released on the SDN, you may submit it to be released. Head over to the New Script page where you will be presented with a script submission form. You can find instructions on how to fill the form below.
General
In this part you are required to specify metadata for the script. The details you input here is used to display
the script on the DreamBot store, the SDN and in the client's script manager. Note that the metadata specified
in the script's ScriptManifest will be overridden by these values for the SDN version of the script.
Category-
Select the most relevant category for the script. If there is no specific category that is to be considered as the main category, choose Other.
For example, a pickpocketing script should be categorized as a Thieving script and not as a Money Making script despite it making some money.
Name- Give the script a unique and descriptive name. You can reserve a brand name for your scripts on the forums. You can't use a brand name that is in use by another scripter.
Description- Write a short description that is displayed to the user on the SDN and in the client's script manager. Anything you state here must be factual, provable and relevant to the script.
Search tags- Specify tags to aid in matching the user's search input to this script in the SDN. For example, one could specify
gotras a search tag for a Guardians of the Rift script. Thread URL- You will need to create a thread for this script on the SDN Scripts section of the forums. The thread is used to give further details about the script and it also works as a channel where the script's users can get in contact with you. Paste the thread's URL here.
Image- Upload either a
.jpgor a.pngimage with a maximum size of 512kB. The recommended image dimensions are 200x200. Ironman Supported-
If the script works well on ironman accounts, you may mark it as ironman friendly. Scripts are not required to be completely self-sufficient in order to be classified as ironman friendly.
For example, a Fletching script designed to restock through the Grand Exchange can simply check whether the account is unable to trade with other players and stop when out of materials. However, the script couldn't be classified as ironman friendly if it insists on using the Grand Exhange and ends up getting stuck on an ironman account.
QuickStart Supported- Mark whether the script supports the QuickStart feature.
VIP Features Required- Mark whether the user must be VIP in order to be able to run the script. For example, if the script requires menu manipulation or no click walking to be enabled.
Pricing
You can make the script accessible for all users for free, or choose to limit it to those who have purchased it.
Script Type-
Select whether the script should be released as free or paid.
Important
Paid scripts can only be released by scripters who have acquired the Scripter+ or Scripter++ rank. You can read more information about the scripter ranks in Forum Ranks.
Per Instance Pricing- For eligible scripts the number of instances a user is able to run can be limited. The user can run as many instances of the script simultaneously as they have purchased instances. The user is given the option to purchase 1, 2, 5, 10, 25, 50 or even 100 instances at once, and you can price the tiers separately. It's common to offer a bulk discount. The user can stack up their instances with later purchases.
Automated Trial Length in Hours- Specify for how long a user is allowed to try the script without purchasing it. Automated trials allow users to instantly try the script, letting them ensure it fits their needs and is still functional. It is highly recommended to enable this option. It both reduces refunds, and can convince users to purchase your script.
You can use the form below to generate the desired pricing model for your script.
Submitting the form stores the pricing model in your clipboard.
Include the generated PRICING({...}) text in the notes of your SDN request.
Git Setup
In this part you need to specify where the SDN compiler can find your script's source code.
Script Repo-
Enter the name of your DreamBot git repository.
Failure
External git repositories, such as one hosted at GitHub, can't be used to release your scripts from. You will need to upload your source code to a repository hosted by DreamBot.
Script Module- Enter the name of your script's module inside the repository. The module name shouldn't contain whitespaces or any special characters.
SDN Parameters-
You can specify parameters that can be accessed at script runtime with
AbstractScript#getSDNParameters. A common use case for this is to limit the features available in the script.For example, a script designed for Rock crabs doesn't differ much from that for Sand crabs. Your module might be a generic crab killing script but you can derive individual scripts from it by specifying
rockandsandas the corresponding SDN Parameters. The script would then read this parameter on start and know which crab type to attack.The SDN Parameters are also commonly used in Using a Single Module for Your SDN Scripts.
When you've finished filling the form go ahead and submit it. Your submission will be reviewed by the SDN Manager and it might be approved as is, or you may be asked to change something in it before it can be released. In any case, you can view the status of the request in the Requests page.
Update a Script
If your script submission has been approved, congratulations! Now that your script has been released, you should keep it updated to avoid it being removed for being outdated or abandoned. In this section you'll learn how to maintain your released scripts.
You can view all your published scripts on the Uploaded Scripts page. Here you can edit a script's details or request the script to be recompiled so that your changes made to the script are delivered to users.
Edit Script Details
After the script's release, you may want to update the details you specified upon filling the script submission form. Maybe to update the description after adding new features, change the image or to adjust the pricing. All the details can be edited at a later date. Simply click the Edit button for the corresponding script in the Uploaded Scripts page and you will be presented with the same form you used to first submit the script.
Make any necessary changes in the form and submit it. This will create a new SDN request that will need to be reviewed by the SDN Manager. You can view the status of the request or cancel it in the Requests page.
Recompile the Script
Whenever you want to deliver new features or fixes to your script's users, you need to first upload your changed source code to your repository and then request the script to be recompiled on the SDN.
Push the Changes to the Repository
Say you have modified your script's source code to fix a bug. The script source files have changed in your local repository but the remote repository is not yet aware of any changes. To push the changes to the repository you will proceed similarly to how you initially pushed the files.
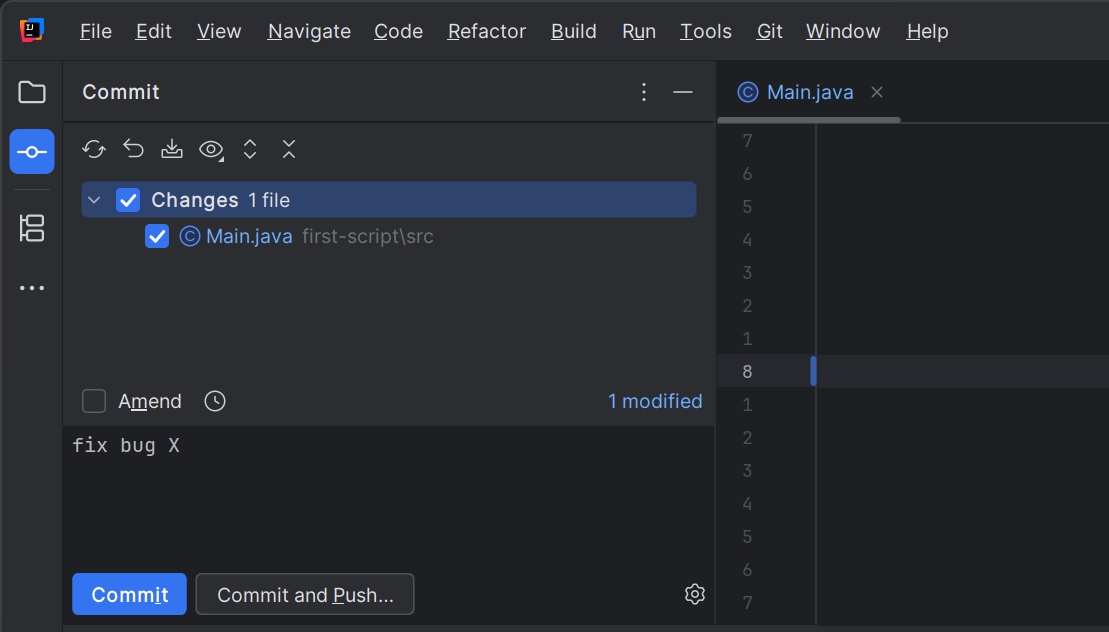
- Open the Commit tool.
- Check the boxes next to the changed files you want to upload to the repository.
- Write a Commit Message to describe the changes, such as
fix bug X. - Click on Commit and Push..., and finally on the window that opens, select Push.
Request the Script to Be Recompiled
After you've successfully pushed your changes to the repository, you can head over to the Uploaded Scripts page and click the Request Recompile button for the script you want to update. As with other SDN requests, a request to recompile the script will need to be reviewed by the SDN Manager before the changes are made available to users. You can view the status of the request or cancel it in the Requests page.